IN BRIEF
This article explains how to manually create class tuition charges from a family ledger in iClassPro. It includes instructions for billing both current and past class enrollments, and outlines how to resolve errors related to deleted Discount Schedules.
Overview
Manual tuition charges allow administrators to create charges for individual class enrollments directly from a family’s ledger. This can be useful for billing outside automated billing cycles, managing adjustments, or addressing specific enrollment cases.
Important Notes
- If using a multi-location account, ensure the correct Location is selected before creating the charge.
- All enrollments for the student/family should already exist before charges are created. This ensures multi-class and multi-student discounts are calculated correctly.
- Discounts only apply to enrollments within the same location.
- The system does not prevent staff from manually creating duplicate tuition charges. Please check existing charges to ensure the proper Charge Category is used for any manually created charges.
For session-based or rolling session-based enrollments, if there is a gap between session dates, the system will bill the gap as if it were a monthly enrollment. To avoid this, update your Blackout Schedule to include any session gaps.
See How Do I Create a Blackout Schedule? for more details.
Accessing the Feature
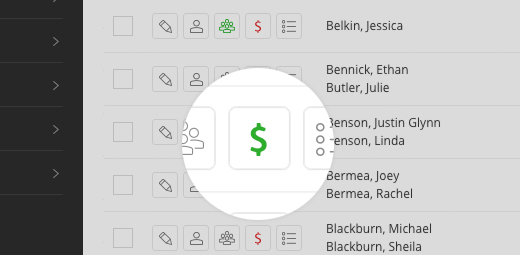
- Navigate to the Families or Students page.
- Search for and select the family or student you want to bill.
- Click the Ledger ($) icon to open ledger options.
Step-by-Step Instructions
Billing for current class enrollments
- Go to the Family or Student page and Search for the family or student you wish to charge.
- Click the Ledger icon ($) to open the ledger options.
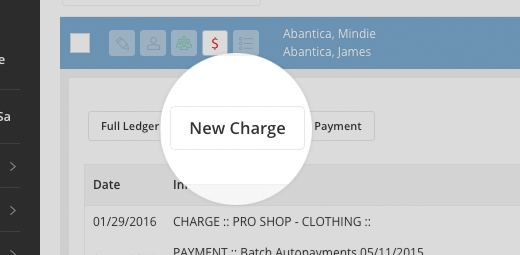
- Click New Charge.
- Click on the Line Item Type Dropdown.
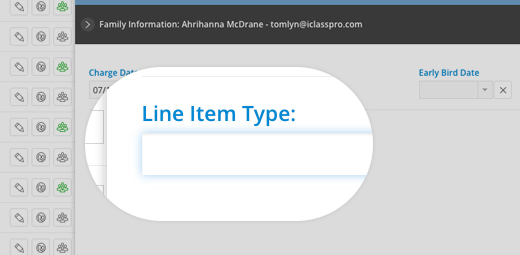
- Choose Class Tuition line item type.
- If you are creating the charge prior to the student's actual enrollment start date, tick the box next to the As Of Date field and enter the date when the enrollment will be active.
- Under the "Class Enrollments" drop down menu, select the enrollment you are billing for.
- Adjust the Charge Title and Dates at the top of the window.
(The charge title will automatically fill with the first line item title if left blank. The charge date and due date always default to the current day.)- NOTE: While it is possible to future-date charges in iClassPro, we do not recommend doing this as it makes tracking the payment in financial reports more difficult.
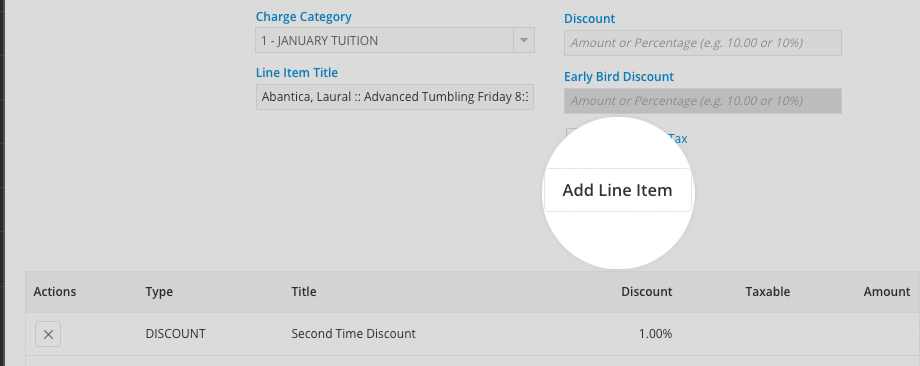
- Using the drop down menu to the right of the line item type you chose, select the Charge Category to describe the charge.
- The Amount will automatically fill in based on the tuition attached to the class and any discounts or proration.
- By default, if there is a minimum charge amount specified in a Discount Schedule attached to the class being billed, the Apply Minimum Charge Amount option will be enabled. Staff members can override this amount by de-selecting this option.
- NOTE: The system will display a message if the amount populated is due to a tuition override.
- If the student qualifies for any Special Discounts or multi-class/multi-student discounts, these will be reflected in separate Discount fields.
- NOTE: If billing by timeslot and the Discount has been calculated as a whole dollar amount (rather than a percentage), if the charge Amount is manually edited, it is expected that the Discount field will not automatically update to account for this difference.
- (Optional) To apply a second Discount or charge Tax on a specific line item in the charge, use the appropriate fields below the line item amount. (The option to CHARGE SALES TAX will automatically be enabled and will select the associate tax rate if the program associated with the charge has a tax rate set.)
- Click +Add Line Item to add the line item to the charge entry. This will clear the line item information at the bottom of the screen and add the line item to the list at the middle of the window.
- (Optional) Repeat steps 4-8 to add any additional line items to this charge entry.
- Adjust the Dates at the top of the window if needed to adjust the Charge Date, Due Date or set an Early Bird Date.
- For more information about Early Bird discounts, see our "What is an Early Bird Discount?" document.
- Note: The charge title will automatically fill with the first line item title if left blank. The charge date and due date always default to the current day.
- Click Create to save all line items in this charge window as separate charge entries on the ledger, or Create & Make Payment to launch the "New Payment" screen.
NOTE: Staff members will require the "Change Charge Amount" permission to make ANY additional edits to the charge (including manually editing the amount, discounts, or adding line item entries for "Discount" or "Promo Code").
Billing for past class enrollments
- Go to the Family or Student page and Search for the family or student you wish to charge.
- Click the Ledger icon ($) to open the ledger options.
- Click New Charge.
- Click on the Line Item Type Dropdown.
- If the student has had current or past class enrollments, the Class Tuition line item type will be active.
- NOTE: If ONLY past enrollments are found, the "Class Enrollment" drop-down menu will read ** NO CLASS ENROLLMENTS FOUND ** until you complete steps 6-7.
- Under the "As of Date" field, enable the "Bill for Past Enrollment" option.
- Set the "As of Date" to a date when the class enrollment you wish to bill for would have been active.
- Under the "Class Enrollments" drop down menu, select the enrollment you are billing for.
- Adjust the Charge Title and Dates at the top of the window.
(The charge title will automatically fill with the first line item title if left blank. The charge date and due date always default to the current day.)- NOTE: While it is possible to future-date charges in iClassPro, we do not recommend doing this as it makes tracking the payment in financial reports more difficult.
- Using the drop down menu to the right of the line item type you chose, select the Charge Category to describe the charge.
- The Amount will automatically fill in based on the tuition attached to the class and any discounts or proration.
- By default, if there is a minimum charge amount specified in a Discount Schedule attached to the class being billed, the Apply Minimum Charge Amount option will be enabled. Staff members can override this amount by de-selecting this option.
- NOTE: The system will display a message if the amount populated is due to a tuition override.
- (Optional) To apply a second Discount or charge Tax on a specific line item in the charge, use the appropriate fields below the line item amount. (The option to CHARGE SALES TAX will automatically be enabled and will select the associate tax rate if the program associated with the charge has a tax rate set.)
- NOTE: If billing by timeslot and the Discount has been calculated as a whole dollar amount (rather than a percentage), if the charge Amount is manually edited, it is expected that the Discount field will not automatically update to account for this difference.
- Click +Add Line Item to add the line item to the charge entry. This will clear the line item information at the bottom of the screen and add the line item to the list at the middle of the window.
- (Optional) Repeat steps 4-9 to add any additional line items to this charge entry.
- Adjust the Dates at the top of the window if needed to adjust the Charge Date, Due Date or set an Early Bird Date.
- For more information about Early Bird discounts, see our "What is an Early Bird Discount?" document.
- Note: The charge title will automatically fill with the first line item title if left blank. The charge date and due date always default to the current day.
- Click Create to save all line items in this charge window as separate charge entries on the ledger, or Create & Make Payment to launch the "New Payment" screen.
NOTE: Staff members will require the "Change Charge Amount" permission to make ANY additional edits to the charge (including manually editing the amount, discounts, or adding line item entries for "Discount" or "Promo Code").
See our "What is the Class Tuition Charges Task?" document for details on creating tuition charges in bulk using the Class Tuition Charges task.
Working with deleted Discount Schedules
If a Discount Schedule was deleted while it was still attached to a class or Program, staff members may see the following error message:
This amount was calculated using a discount schedule which has been deleted.
To prevent scenarios where a family would not be able to complete enrollment via the Customer Portal/Mobile App, iClassPro still honors the Discount Schedule so the enrollment process can continue.
If the Discount Schedule should no longer be used, staff members need to update the class and/or Program to remove the Discount Schedule attachment before creating the charge(s).
Troubleshooting & FAQs
-
Why are discounts not applying correctly?
- Ensure the family’s enrollments are all linked to the same location. Discounts do not apply across multiple locations.
-
Can I bill across session gaps?
- If you are billing for session-based/rolling session-based enrollments and there is a gap between the end of one session and the start of the next, the system will bill for any dates within the gap as if it were a monthly enrollment. To prevent potential billing issues caused by this scenario, it is recommended that you add dates to your blackout schedule to account for the date gap.
-
What permissions do staff need to edit charges?
- The Change Charge Amount permission is required to edit or add line items, discounts, or promo codes.
-
Are staff members prevented from creating duplicate tuition charges?
- No. The system does not prevent staff from manually creating duplicate tuition charges. Please check existing charges to ensure the proper Charge Category is used for any manually created charges.